We are not Watched — this is an independent comparison page for users looking for an alternative.
Switching IPTV provider — the checklist for a clean change
Switching IPTV providers refers to the process of changing from one Internet Protocol Television service to another. This transition often requires careful planning to ensure the preservation of user preferences and seamless access to content.
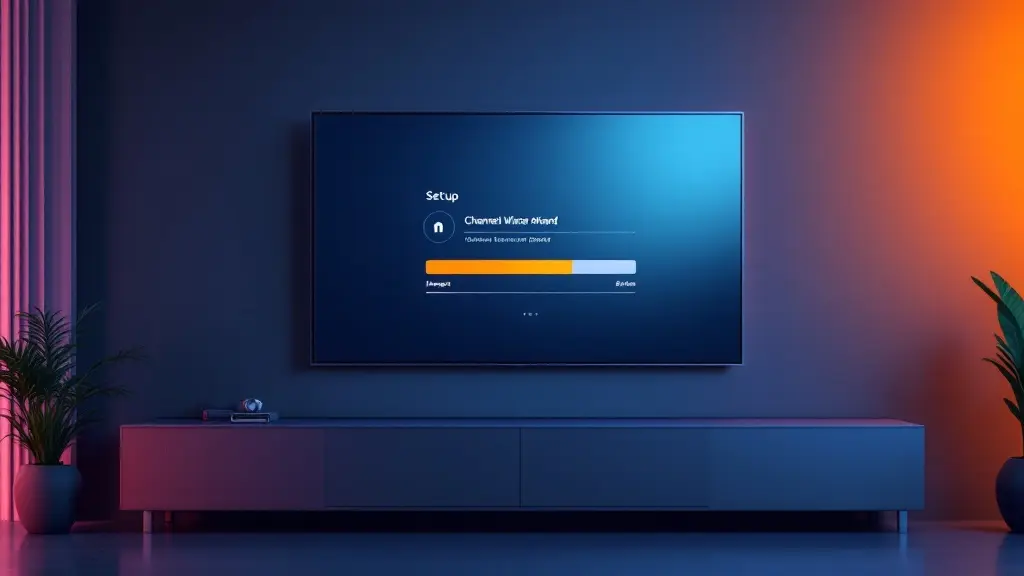
A clean IPTV provider switch works best as a controlled migration: back up your current playlist and settings, test the new service in parallel, then cut over device by device. VenneTV supports a smooth change with parallel testing, clear M3U/Xtream setup, and practical guidance for moving favorites and EPG habits. We also offer a 48-hour free trial (email-only, no credit card) so you can verify the channels you actually watch before cancelling anything. On this page, you’ll find a step-by-step checklist for M3U backup, EPG notes, device migration, and a clean final switch-over.
1) Before you touch anything: inventory your current setup
Most “lost channels” problems are really “lost settings” problems. Before you cancel or overwrite anything, take 15 minutes to document what you already use.
Write down your current IPTV chain:
Make a “must-have” list. Don’t test 7,000 channels one by one. List the 20–40 channels and 10–20 VOD titles you actually care about, plus any language-specific content you rely on (German UI, subtitles, original audio).
Common pitfall: you forget which app was tuned to your network and device, then the new provider “feels worse” simply because you are using a different player or default settings. Your inventory prevents that.
Write down your current IPTV chain:
- Which player app(s) do you use? (e.g., TiviMate, IPTV Smarters, XCIPTV, Perfect Player, Smart IPTV, web player)
- Which devices? (Fire TV, Android TV box, Samsung/LG Smart TV, phone/tablet, Windows/Mac)
- Login method: M3U URL or Xtream Codes (server URL + username + password)
- EPG source: provider EPG only, or a separate EPG URL?
- Do you use multiple playlists? (e.g., one for live TV, one for VOD)
- Any special settings: time shift, external player, buffer size, audio track preference
Make a “must-have” list. Don’t test 7,000 channels one by one. List the 20–40 channels and 10–20 VOD titles you actually care about, plus any language-specific content you rely on (German UI, subtitles, original audio).
Common pitfall: you forget which app was tuned to your network and device, then the new provider “feels worse” simply because you are using a different player or default settings. Your inventory prevents that.
2) Back up what you can: M3U, EPG notes, and your favorites structure
You usually can’t “export channels” from a provider the way you export contacts from a phone. But you can back up the pieces that matter: your playlist links and your local app database (favorites, groups, sorting).
Backup checklist:
TiviMate users: your favorites, groups, and settings live inside TiviMate’s database. If you plan to keep the same structure, do a database backup/export before you add or replace playlists. Use TiviMate’s built-in backup feature (location depends on your device). Then you can restore it on the same device or another Android TV/Fire TV device.
Why this matters: if you switch providers and only paste a new playlist, you’ll get the new provider’s raw category layout. That’s fine for a quick test, but it’s not a clean long-term switch if your household relies on a familiar favorites list.
Common pitfall: overwriting your only working playlist in the app. Always keep the old one intact until the new one is proven on your network.
Backup checklist:
- Save your current M3U URL (or Xtream server URL + username + password) in a password manager.
- Copy the EPG URL if your setup uses a separate EPG source. If you only use provider EPG, note that too.
- Screenshot your favorites and custom groups. It’s a quick reference when you rebuild.
- Note your channel numbering / sorting rules (by country, by category, by “favorites first”).
TiviMate users: your favorites, groups, and settings live inside TiviMate’s database. If you plan to keep the same structure, do a database backup/export before you add or replace playlists. Use TiviMate’s built-in backup feature (location depends on your device). Then you can restore it on the same device or another Android TV/Fire TV device.
Why this matters: if you switch providers and only paste a new playlist, you’ll get the new provider’s raw category layout. That’s fine for a quick test, but it’s not a clean long-term switch if your household relies on a familiar favorites list.
Common pitfall: overwriting your only working playlist in the app. Always keep the old one intact until the new one is proven on your network.
3) Run both providers in parallel (the clean way to test)
A clean switch means you don’t “jump” on day one. You run the new provider next to the old one, on the same devices, at the same times you normally watch. That reveals real-world issues like peak-hour stability, audio tracks, and EPG accuracy.
Parallel test checklist (48 hours is usually enough):
How VenneTV’s parallel test works: you can request a 48-hour free trial via email (no credit card). You then load the provided access into your preferred app or use the web player. That makes it easy to compare side-by-side without committing to a contract. VenneTV is stable since 2018 and includes German-language support, which helps if you need guidance during setup.
Common pitfall: testing only for 10 minutes on a random afternoon. A short test can look perfect, then disappoint at peak time. Parallel testing prevents surprises.
Parallel test checklist (48 hours is usually enough):
- Add the new provider as a second playlist in your IPTV app (don’t delete the old one).
- Test at your real viewing times: morning news, evening prime time, weekend.
- Check your “must-have” list: channels, languages, subtitles, VOD search.
- Verify EPG: now/next data, correct time zone, channel-to-EPG mapping.
- Try multiple networks if relevant: home Wi‑Fi vs. mobile hotspot.
How VenneTV’s parallel test works: you can request a 48-hour free trial via email (no credit card). You then load the provided access into your preferred app or use the web player. That makes it easy to compare side-by-side without committing to a contract. VenneTV is stable since 2018 and includes German-language support, which helps if you need guidance during setup.
Common pitfall: testing only for 10 minutes on a random afternoon. A short test can look perfect, then disappoint at peak time. Parallel testing prevents surprises.
4) Migrate your device setup (TiviMate export, app choice, web player)
Once the new provider passes your parallel test, migrate cleanly. That means: keep your familiar app, keep your favorites structure, and standardize the setup across devices.
Recommended migration flow:
About app choice with VenneTV: you can use the web player for quick access and also choose a free IPTV app on your devices. That’s useful if you want one setup on TV and a simpler setup on mobile.
4K note: VenneTV supports 4K UHD where available. During migration, test 4K streams on the device that will actually play them (some TVs/boxes struggle with high bitrate over Wi‑Fi). If 4K buffers, try wired Ethernet or a stronger Wi‑Fi band before you blame the provider.
Common pitfall: migrating only one device and leaving others on the old setup. Then you “cancel too early” and a family member loses access. Standardize first, cancel later.
Recommended migration flow:
- Choose your main player (the one you’ll support long-term). If you already know TiviMate, stick with it.
- Restore/import your app backup (for TiviMate: restore the database backup).
- Add the new provider playlist and set it as default. Keep the old playlist for a few days as fallback.
- Rebuild favorites using your screenshots if the channel IDs differ between providers.
- Repeat on the second device (Fire TV in bedroom, phone, tablet). Consistency reduces “it works here but not there” issues.
About app choice with VenneTV: you can use the web player for quick access and also choose a free IPTV app on your devices. That’s useful if you want one setup on TV and a simpler setup on mobile.
4K note: VenneTV supports 4K UHD where available. During migration, test 4K streams on the device that will actually play them (some TVs/boxes struggle with high bitrate over Wi‑Fi). If 4K buffers, try wired Ethernet or a stronger Wi‑Fi band before you blame the provider.
Common pitfall: migrating only one device and leaving others on the old setup. Then you “cancel too early” and a family member loses access. Standardize first, cancel later.
5) EPG and channel mapping: keep guide data accurate
EPG is where switches often feel messy. Even if streams work, a broken guide makes the experience feel unreliable. Treat EPG as a separate task and validate it carefully.
EPG checklist:
When to use an external EPG source: If you previously used a separate EPG URL, keep it noted. But don’t assume it will map perfectly to a new provider’s channel list—channel IDs and naming can differ. Start by testing the new provider’s EPG first, then only add external EPG if you have a specific gap to fix.
With large catalogs: providers like VenneTV offer 7,000+ live channels and 18,000+ movies and series. That size is great, but it also means you should focus your EPG work on the categories you use (e.g., DE/EN channels, kids, documentaries). Build favorites early; it reduces the need to browse massive lists.
Common pitfall: mixing multiple EPG sources immediately. That can create duplicates, mismatched logos, or wrong schedules. Add one source, verify, then optimize.
EPG checklist:
- Time zone: confirm the guide matches German/EU time.
- Now/Next: check at least 10 channels from different categories.
- 24–48h depth: confirm the guide actually loads ahead (some setups show only now/next).
- Channel ↔ EPG mapping: if a channel shows the wrong program, you may need to remap EPG IDs in your app.
- Language: verify program titles/descriptions are in the language you prefer where available.
When to use an external EPG source: If you previously used a separate EPG URL, keep it noted. But don’t assume it will map perfectly to a new provider’s channel list—channel IDs and naming can differ. Start by testing the new provider’s EPG first, then only add external EPG if you have a specific gap to fix.
With large catalogs: providers like VenneTV offer 7,000+ live channels and 18,000+ movies and series. That size is great, but it also means you should focus your EPG work on the categories you use (e.g., DE/EN channels, kids, documentaries). Build favorites early; it reduces the need to browse massive lists.
Common pitfall: mixing multiple EPG sources immediately. That can create duplicates, mismatched logos, or wrong schedules. Add one source, verify, then optimize.
6) Cancel safely: timing, billing, and a rollback plan
Only cancel when the new setup has passed real use. “Clean switching” is mostly about timing and having a rollback plan if something unexpected happens.
Safe cancellation checklist:
Rollback plan (simple but effective): keep the old playlist in your app for 7–14 days. If something comes up (EPG mismatch, one missing channel, a device-specific issue), you can switch playlists instantly without re-entering everything.
Payment flexibility: if you want to avoid long commitments, choose a provider that doesn’t lock you into contracts. VenneTV offers no subscription and no contract lock-in, so you can adjust based on your needs. If you prefer alternative payment methods, crypto payment is available (useful if you don’t want card-based recurring billing).
Common pitfall: cancelling first, then discovering your new setup needs one more evening of tuning (EPG mapping, buffer settings, device decoding). Delay cancellation until the experience is stable for your household.
Safe cancellation checklist:
- Keep the old provider active until you’ve used the new one for several sessions (not just one evening).
- Confirm all devices are migrated: living room TV, bedroom TV, phone/tablet, laptop.
- Check account/billing dates so you don’t cancel too early or pay double longer than needed.
- Export/backup final settings in your app after you’re happy (TiviMate backup again).
- Keep old credentials stored for a short period (in case you need to compare or verify something).
Rollback plan (simple but effective): keep the old playlist in your app for 7–14 days. If something comes up (EPG mismatch, one missing channel, a device-specific issue), you can switch playlists instantly without re-entering everything.
Payment flexibility: if you want to avoid long commitments, choose a provider that doesn’t lock you into contracts. VenneTV offers no subscription and no contract lock-in, so you can adjust based on your needs. If you prefer alternative payment methods, crypto payment is available (useful if you don’t want card-based recurring billing).
Common pitfall: cancelling first, then discovering your new setup needs one more evening of tuning (EPG mapping, buffer settings, device decoding). Delay cancellation until the experience is stable for your household.